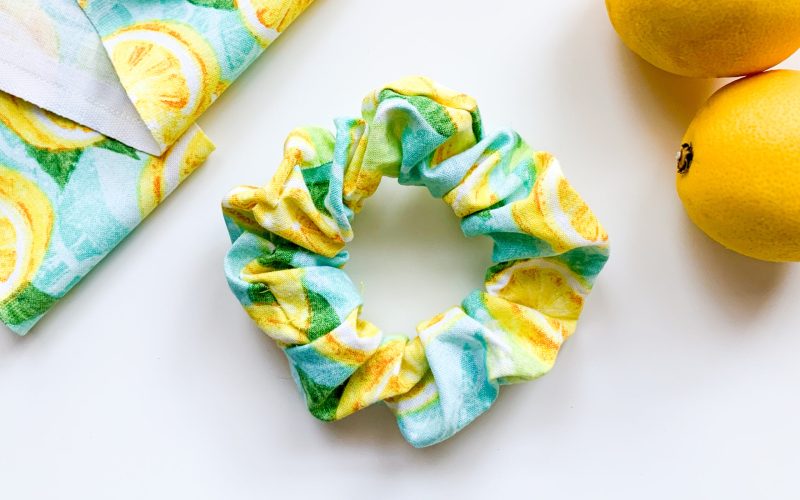
After years of being ‘uncool,’ the scrunchie craze is back and stronger than ever! We know it’s not just us feeling nostalgic about our childhood ponytails, adorned with a different scrunchie every day of the week. Scrunchies are making a comeback on the runway, TikTok, and even T.V. shows, so we’re here to help you keep up with the times (err, go back in time?) and teach you how to make a scrunchie from scratch.
This easy step-by-step sewing project is great for beginners. If you’ve had limited sewing experience or haven’t picked up the needle and thread in a couple years, this is a great project to practice your skills. Once you gather all your supplies, you’ll be ready to rock your cute new scrunchie in about one to two hours.

Vita Zakhu
Supplies Needed
- Fabric 3.5 x 22 in (9cm x 56 cm)
- 9 inch elastic (1/4 or 1/2 in wide)
- Sewing Machine (optional)
- Measuring tape
- Scissors
- Needle
- Matching Thread
- Small or medium safety pin
- Sewing pins
What kind of fabric should I use for my scrunchie?
Cotton is the easiest fabric to use for your first few scrunchies. It’s doesn’t stretch, so if you’re a beginner, your stitches will come out even and secure. Velvet or Lycra is another common material for scrunchies (especially for the 80s look!), but it’s a stretchy fabric and harder to work with.
Can I hand sew or should I use a sewing machine?
You can use either method! If you don’t have a sewing machine, don’t worry. Hand sewing is just as easy and will only take you a few more minutes than a sewing machine.
Step 1: Cut Your Fabric

Vita Zakhu
Cut the fabric for your scrunchie to the designated size: 3.5 x 22 inches. This is a good standard size to start with, however, you can make the fabric longer or shorter, depending on if you want more or less ‘scrunch.’
Step 2: Sew The Edges Together

Vita Zakhu
The next step is to sew the lengths of the fabric together. Fold your fabric in half with the “wrong” side facing out. The “face” side–the one with the pattern–will be on the inside.
Align the edges of your fabric and use a few sewing pins to keep the fabric together. Since cotton fabric is easy to work with, you can also forego the pins.
Use a simple running stitch to adjoin the fabric to each other. If you’re a more advanced sewer or want to give yourself a challenge, you can also use a backstitch. The backstitch is stronger, but will take a longer time than a running stitch.
Step 3: Turn It Inside Out

Vita Zakhu
Take a small or medium-sized safety pin and clip it on one side of the fabric. Feed it through the sewed fabric to turn it right side out. Now, you’ll be able to see your fabric pattern!
You can press the fabric with an iron to make it more crisp, but it’s not a must if you don’t have one.
Step 4: Measure And Cut The Elastic

Vita Zakhu
Next, take your elastic and cut it 8 inches (9 inches if you have thick hair). Another way to measure the elastic is to wrap it around your wrist to make sure it fits around your hand. If you choose this method, make sure to make it a tad longer to leave room for sewing or for tying the ends of the elastic together in the following step.
Step 5: Thread The Elastic Through The Scrunchie

Vita Zakhu
Once you have your elastic measured and cut, clip your safety pin to one side of the elastic and feed it through the scrunchie fabric. The fabric will bunch and start taking the shape of the classic scrunchie look. Make sure to hold the end of the elastic securely with one hand or pin it with a safety pin to the other side so it doesn’t slip through.
Step 6: Stitch or Tie the Ends

Vita Zakhu
Now, you will see the elastic peeking through both sides of the fabric. Tie the ends together. You can also stitch them together if you don’t want a small bump on the inside of your scrunchie. If you are stitching, make sure to overlap about ½ an inch of fabric before stitching them to each other.
Step 7: Stitch The Fabric Closed

Vita Zakhu
Lastly, take one side of the fabric and place about ½ an inch of it inside the other end. Stitch the ends closed with an “invisible stitch,” also known as a ladder or slip stitch.
Congrats! You’ve made your first scrunchie. You can sport it around the house, during a walk around the neighborhood, or at your next virtual happy hour with the girls. Now, you can make matching scrunchies for each of your girlfriends or teach them how to make one themselves! If you enjoyed this fun DIY project, you might enjoy painting on canvas or creating popsicle stick crafts next.
