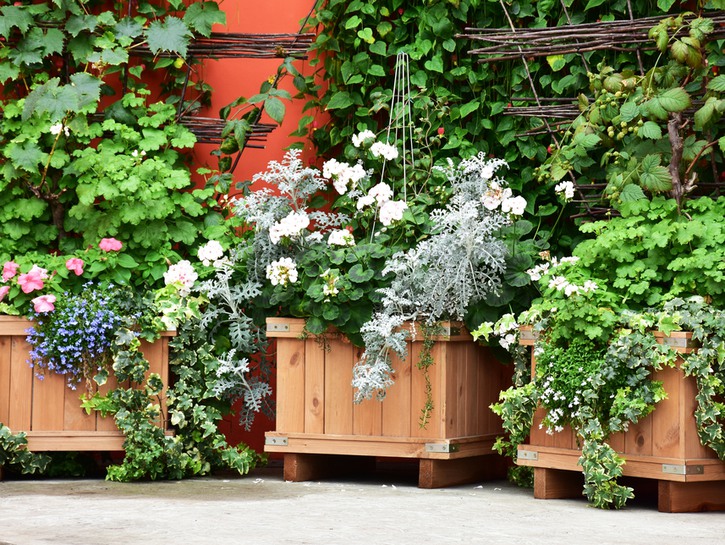
If you’ve been bitten by the green thumb bug lately, then you’re not alone. A home garden is a great way to destress while also saving money. You can easily grow some of your favorite spices, vegetables, and herbs right in your own backyard. Growing your own ingredients can offset some grocery costs in the long run, and taking care of your plants has proven to be a great way to relax and unwind.
If you’ve already been doing this and find that you have various plants sitting around in pots, then your next step may be moving your plants into one shared space — a planter box. Instead of buying one, you can easily make a DIY planter box of your own to fit your herbs, flowers, and vegetables.
There are various types of planter boxes, from the standard wooden box to raised options with details and features such as benches on the sides. You can also have planters that sit at your window for a beautiful display, and deck rail planter boxes that add to the décor. By creating your own DIY planter box, you’re giving yourself a lot of creative freedom in the details department.
We’re going to learn how to build an elegant wooden planter box. After you’ve created your DIY planter box feel free to paint and adorn it to fit your personal style.

Building A DIY Planter Box
What You’ll Need:
- A saw (it can be a mitre, table, jig, circular or hand saw)
- A chisel
- A drill
- Set of bits
- A screwdriver
- A staple gun
- Staples
- Clamps
- (1) 4×4 x 8′ cedar
- (10) 1×6 x 8′ cedar
- (4) 2×4 x 8′ cedar
- A box of 1-5/8″ deck screws
- A box of 3-inch deck screws
- Landscape fabric
Cut List:
- (4) 1×6 x 6-feet
- (6) 1×6 x 22-inches
- (6) 1×6 x 73-1/2-inches
- (2) 2×2 x 22-inches
- (4) 2×2 x 13-inches
- (2) 2×2 x 14-1/2-inches
- (4) 4×4 x 23-3/4-inches
- (2) 2×4 x 6-feet
- (4) 2×4 x 19-3/8-inches

DIY Planter Step 1: Prep
- Use the cut list to cut our wood to fit each of the required measurements. This will allow you to have everything prepared for you to build.
- Cut one of your 2×4 pieces into a 2×2 piece.
DIY Planter Step 2: Build The Base
- It’s time to construct the bottom of your planter box. Lay out all of the 1×6 boards on the floor so that you can look for any defects in the wood including splints and warping. Pick out four boards, which will be used for the bottom. Cut the four boards to measure 6-feet in length.
- Cut the leftover two boards to 6-feet in length, and put them aside of later. They will be used for the stand.
- Measure the four bottom boards’ width, which should be around 22-inches. Cut the same amount from the remaining 6 boards. These will be used for the box ends.
- Set those aside and grab two of the end pieces, and two braces.

DIY Planter Step 3: Create The Sides
- Attach the braces 2-1/4-inches from the edge of the 1×6 boards.
- Use your clamps to hold them together and pre-drill two holes 6-inches from the end. Use the 1-5/8-inch screws to attach them.
- Lay the assembled pieces on their flat side with two other end pieces. Measure their distance from the top of the brace to the bottom of the three combined boards. It will measure around 13-1/
- Cut four pieces of the 2×2 boards to this new length for corner braces. Attached them to the edges of the 1×6 boards with screws.
- Drive your 3-inch screw between the bottom brace and corner braces.
- Attach your four bottom boards to the ends using the 1-5/8-inch screws. You may need to use your clamps to hold the boards down flat.
- Cut your remaining 1×6 boards to fit your sides.
- Screw them to corner braces using your 1-5/8-inch screws. Do this every 12-inches from the center for security. Try using an extra screw in every corner as well to make sure it is durable.
DIY Planter Step 4: Finish Your Planter Box
- Measure from the inside of your box from top to bottom. Use this measurement to cut 2 pieces of the 2×2 to this length.
- Attached them vertically in the center of the side of the box on the inside. Drive a 3-inch screw into if from the bottom to attach it.
- Cut the 4×4 board into four pieces that measure 23-3/4-inches in length. These will be the four legs of your DIY planter box.
- Place the 6-foot 2×4 boards at the bottom of your box. We are separating the areas in your planter box. Measure out about 19-1/4-inches of space.
- Then cut four pieces to fit the space loosely in between the 2x4s. Add them in with 3-inch screws.
- Now you can attach your legs to each corner using your screws.
- Take your landscaping fabric and cut it to fit inside of your planter box. Drill ¾-inch holes every 12-inches for drainage. Then staple your fabric into the planter box.
- Now place your plants inside!

